The first was a DIY doll sundress that you can see instructions for here. Basically it's just dyeing the Springfield Collection's white nightgown. I decided to do a blue dress for myself and a red dress for one of my best friend's dolls, so I ran down to Michaels to get supplies:
 |
| The supplies for the red dress |
I followed the directions on the package for the bucket method.
 |
| I dyed the blue dress before the red dress so behold the blue spoon! |
I've always really liked this nightgown but I had no need for it. My dolls don't wear nightgowns often enough. So I'm really glad I had a reason to finally buy it!

In the Doll Diaries post they cut off the pink ribbon that comes attached to this
dress and I did for the blue dress. But since this dress was going to
be red anyway I decided the ribbon could stay. I did unlace it though to make sure that the dye could get to the lace under.
The bucket method requires a lot of stirring. So that's what I did for a very long time. It looked weirdly maroon in the bowl!
 |
| Stirring the bowel o' blood |
The same week Doll Diaries did the dress tutorial they also did one for customized doll shoes. You can see that here!
For some reason the lace on the red dress turned lavender so I decided to paint the shoes to match that!
 |
| You may recognize these shoes from Dressing Your Doll on a Dime Part Three! |
They used the plain black patent leather flats from the Springfield Collection for the original post, but my Michaels didn't have them so I grabbed these silver shoes instead. I used Tulip Soft Matte in Periwinkle for the purple shoes and Tulip Soft Metallics in Azure Blue for the other pair. The Tulip Soft is perfect for this project, it stays flexible and covers great!

This is after one coat. I did two on the purple shoes and three for the blue.
 |
| Please ignore my husband's giant jars of protein powder! |
And now to see how it all turned out:

Kanani is modeling the red dress.
 | |
| I'm going to have to make one for Kanani now! Maybe orange? |
After I took those pictures I realized that I didn't paint the soles of the shoes and so I went back, repainted and remod-podged. I think they look much better:

And I'm probably the only one that would have cared!
How about one more picture for the road:
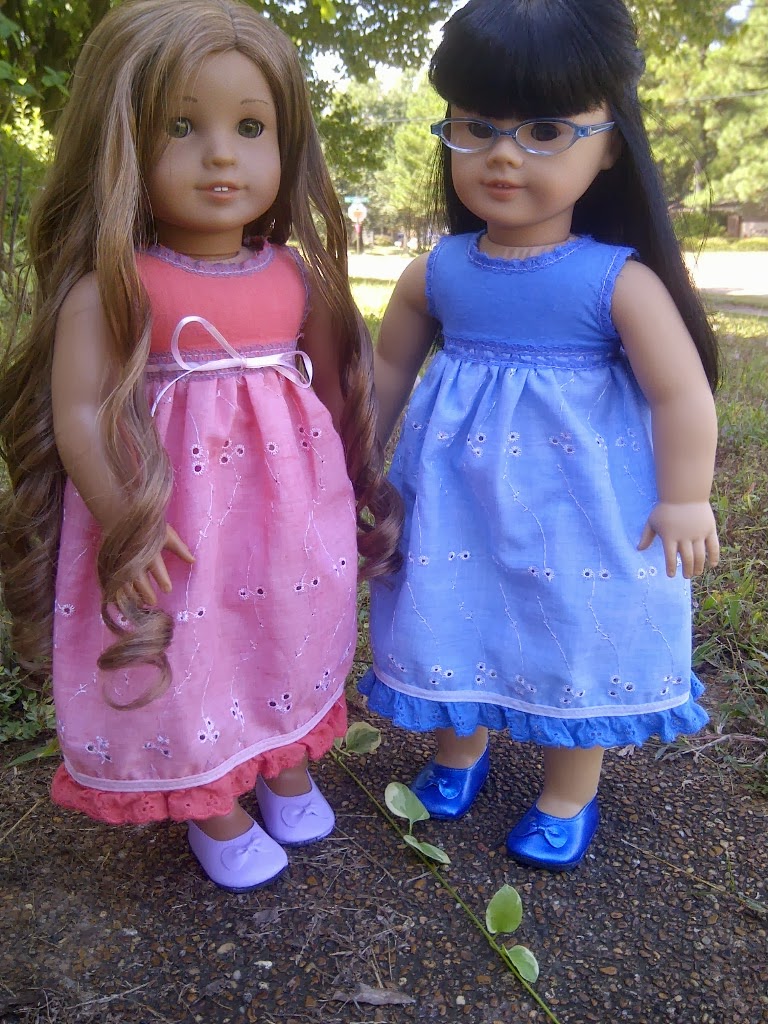 |
| The girls enjoying a beautiful day! |
I'm sorry to comment on such an old post, but does anyone have any idea how long that nightgown has been around? I had one in 2005 for my first Our Generation doll!
ReplyDeleteOh goodness who knows but they still sell it!
Delete